Showing posts with label food. Show all posts

Monday, February 22, 2016

Q is for Quick Backpacking/Picnic Meals

It's almost backpacking season, so it's time to start doing some planning, to include meal prep.  Gone are my days of settling for Slim Jims, crackers and Pop Tarts for breakfast and lunch.  We do still opt for quick meals for breakfast and lunch, but we now significantly boost the quality.  I've provided some of our favorites below.  Note that these can also be used for picnicking as well if you don't like stopping at restaurants while traveling or if you just like to mix it up a bit.  Unfortunately, I don't have very many pictures for this post, so you'll need to use your imagination a bit.

Breakfast

Oatmeal:  Pick up some some instant oatmeal packets.  I recommend two packets per person for backpacking since you burn calories much more quickly on the trail.  If you want to bulk it up with extra protein or even more calories, you can also add some dry milk powder (amount varies based on preference but no more than the dry equivalent of what you would normally put in at home).  Prep it ahead of time by adding all of the above to a quart-size ziplock bag.  Then, on the trail, add boiling water to desired consistency (more soupy vs more congealed) and let it sit for a couple of minutes.

Bacon-Cheese Grits:  Instant grits packets, Butter Buds, dry cheese powder (the equivalent of 1/3 cup of real shredded cheese), and Real Bacon Bits (not the fake bacon-flavored bits) to taste.  Combine all ingredients in a quart-size ziplock bag ahead of time, then add boiling water on the trail to desired consistency.  Credit to The Scout's Backpacking Cookbook for the inspiration. 

Yosemite Yogurt Drops:  Simply dehydrate small splotches of your favorite flavor yogurt (quarter-size drops are perfect size) until completely dry and leathery, then package into a small, snack-size ziplock bag.  I also refer to these as yogurt jerky because by the time you get around to eating them, many of the drops will have stuck together, leaving you to eat it more like jerky.  Credit to The Scout's Backpacking Cookbook. (see picture at bottom)

Niagara Falls Bars:  Quaker Old-Fashioned Oats, whole wheat flour, sesame seeds, brown sugar, ground cinnamon, salt, dry non-fat milk powder, vegetable oil, honey, and vanilla extract.  These require about an hour's worth of prep/cooking time at home, but there is no prep required when eating these on the trail.  They have the consistency of granola bars, but they have a lot more calories.  They also taste great!  These have gotten rave reviews from my entire family and nearly everyone that has had them.  Credit to The Scout's Backpacking Cookbook

Lunch

Peanut Butter and Honey Rollups:  Peanut butter (or Sunbutter if someone has a peanut allergy), honey, and a tortilla.  Combine the peanut butter and honey into a small ziplock bag but carry the tortilla separately.  Be sure the ziplock bag is completely secured, then put the tortilla into a quart-size freezer bag along with the peanut butter-honey ziplock for traveling.  Credit to The Scout's Backpacking Cookbook

Pizza Rollups:  Two tortillas per person, a pizza sauce packet per 2-3 people, 1-2 string cheese sticks per person, and a personal-sized portion of your favorite pizza toppings (pepperoni, precooked sausage, real bacon bits, etc.).  Recommend combining the toppings into their own ziplock bag, along with the string cheese packet(s).  On the trail, add all ingredients to your tortilla and roll it up into a pizza wrap.  Credit to The Scout's Backpacking Cookbook for the inspiration. 

Sausage, Cheese, and Crackers:  Okay, so I said I don't do Slim Jims and crackers anymore, but occasionally, we do still have this similar yet tastier option.  Take a mini sleeve of Ritz crackers (see picture below), a small, sealed log of summer sausage to share among 2-3 people, and cheese squares to share among 2-3 people.  Combine or eat individually as you prefer out on the trail.

These recipes are all very tasty and very quick to prepare out on the trail.  If you're ready to move past junk food-type lunches or just want to add some more options, or if you're looking for some good picnic lunches, give these suggestions a try.  I think you and your crew will be quite pleased.

Crackers for Sausage, Cheese, & Crackers in the middle (my partner was provding the sausage and cheese squares), Oatmeal beside it, and Yogurt Drops on the far left.


Blogging Through the Alphabet” style=

Monday, January 18, 2016

L is for Lighting a Fire

One of the most useful and important outdoor skills you can learn is how to start a fire.  Fires are everywhere -- from bonfires and fire pits with friends to emergency fires in the backcountry to keep warm; from cooking fires to lighting a charcoal grill.  And who doesn't love a good fire in the fireplace in wintertime?  This post covers two different types of fires:  Lighting charcoal and backcountry fires.

Lighting Charcoal
Four years ago, after burning out yet another burner on a gas grill, I was frustrated that I was replacing it about every 2-3 years.  Shortly before then, Brennan's Scout troop had introduced us to a miracle invention:  The charcoal chimney.  I had long ago written off charcoal grills because they never seemed to want to light, and using an entire bottle of lighter fluid to get one set of coals lit somehow didn't seem like the best idea.  After discovering the charcoal chimney, however, I have moved back to the old-fashioned Weber charcoal grill and have never looked back.  It was also shortly after that purchase that I got my dutch oven, which also requires charcoal.  Now I'm happier than a bear in a salmon stream because these charcoal chimneys work every time -- well, almost every time.  Here's how:


The chimney has a raised platform about 2-3 inches off the ground with holes all the way around the bottom.  Roll up about 3 single newspaper sheets and stuff them into the holes at the bottom of the chimney, getting most of the paper underneath (you don't want or need very much sticking out through the holes).  Then fill up the top of your chimney with charcoal and light each of the rolled-up sheets.  As the fire burns the paper underneath, it also licks the briquettes at the bottom of the chimney stack.  The paper should burn long enough to catch those coals on fire, which will in turn light the coals above, and so on until you can see the flames licking out the top of the chimney.  You can tell how well it's working by the amount of smoke coming out the top of the chimney.  If you light the paper on the outside of the chimney, and the fire goes out before the coals get fully lit (your best indication would be the tiny amount of smoke emanating from the chimney), then try sticking your lighter in through the holes at the bottom and lighting the paper underneath the chimney.  While I never had to do that before moving to Colorado, that technique seems to work better here.  Once you get a good fire underneath, the whole process takes about 15 minutes for the flames to reach the top of the chimney.  Allow longer for coals going on a dutch oven, however, to ensure they're fully lit.

Backcountry Fires
Being able to light a fire at a frontcountry campground is a good way to stay warm at night while you're having fun with friends or making s'mores, but in the backcountry it could save your life if you find yourself in a cold situation unexpectedly or without the proper gear.  Of course it starts with standard fire-building techniques -- for example, the tepee method of placing your highly flammable yet short-lasting tinder (like dry grass or leaves) in first in the middle, followed by small twigs, leaned against each other in a circle like a tepee, followed by larger sticks in a tepee around the twigs.  Obviously, the concept is that the fire is easily lit and then gradually spreads to the twigs that take a little longer to light and on to the larger sticks that take considerable time to light.

Sometimes, however, it's not as easy as the charcoal chimney.  For instance, if the tender is damp or doesn't want to light for another reason, a firestarter can help.  Of course, you can buy firestarter sticks just about anywhere from Wal-Mart to Sierra Trading Post, but for much cheaper you can make your own out of cotton balls and vaseline.  Simply take a cotton ball and a daub of vaseline about the size of your pinky nail and work it into the cotton ball.  It usually ends up fairly flat.  I usually make several at a time and store them in a small ziplock bag to take with me on a backpacking trip.

Vaseline-soaked Cotton Balls -- Instant Tinder!
When you get ready to use it, spread it out to provide as much surface area as possible and place it on top of your tinder.  That should jumpstart both your tinder and your twigs.  If rubbing vaseline into cotton balls isn't your thing, or you don't have the ingredients laying around the house, something I guarantee you have that's very light and works just as well, is dryer lint.  (Incidentally, dryer lint also works very well as additional tinder under the charcoal chimney on particularly cold, windy, or otherwise stubborn nights.)  Finally, the coolest (and perhaps most reliable) way to start a fire is with a 9-volt battery and steel wool (no match or lighter required!).  Simply put the steel wool on top of your tinder and touch the terminals of the 9-volt to the steel wool, and presto!  Instant fire!  It's like voodoo magic!

Blogging Through the Alphabet” style=

Monday, January 11, 2016

K is for Kitchen Tote

I like being organized, and, going camping, that's especially important.  It's so easy for stuff to get left out and misplaced or, worse, never even make it on the camping trip because your gear is scattered out in many different places.  Checklists help tremendously, but it's nice having everything all in one place so it's grab-and-go.

We used to keep our camp kitchen gear in a large Rubbermaid tub, but as our family and gear grew, many essentials were getting shoved out.  As I was shopping the sales one day, I came across a tote from REI that is slightly larger than a Rubbermaid tub, but like Hermione's beaded bag, it seems there is always room for more stuff, and there are dividers and organizers to keep the gear more organized inside.


Inside the main compartment, we keep tableware and glasses for 8, two cook pots, the collapsible water jug, two backpacking stoves, two skillets, a bunch of propane bottles, all of our cooking utensils, potholders, cutting boards, paper towels, and a few other various-miscellaneous.  It has a large pocket on each side that hold napkins, foil, plastic wrap, trash bags, dish soap, sponge, and a dish towel.  And most of those pockets aren't even close to full. 


While we rarely use it, this particular model also comes with a small table that can hold a few things since it seems like there is never enough flat work space at a campsite.


All together, this tote holds pretty much all of our camp kitchen gear with the exception of the camp stove and grill, cast iron skillet, dutch oven, and, of course, food.  Speaking of food, since we do travel almost everywhere with our own food, we also recently found another organizer at Sierra Trading Post to hold all of our non-perishable food.  We haven't actually tried it out yet, but I'm excited about the possibilities.


It's basically three large rectangular bags that can be used either separately or inside a "pen" of sorts to keep them all contained.  Granted this won't always work, but square containers tend to fit nicely in our SUV trunk, while providing ample opportunity to stuff additional smaller or odd-shaped items in the crevices, so it makes packing much easier.

The REI tote unfortunately isn't still available.  But, for similar items or organizers that may fit your needs better, REI, Sierra Trading Post, The Container Store, Coleman and even Target are great places to shop for camp kitchen organization, especially if you're willing to be a little creative!

Blogging Through the Alphabet” style=

Monday, January 4, 2016

J is also for Joshua Tree National Park

Back at the beginning of 2013, our family was heading to Disneyland in California.  As I mapped out our route, I realized that we would go right by Joshua Tree National Park.  At that time, I hadn't added the exhaustive list of NPS sites to my Bucket List, but I loved exploring new landscapes.  I was also intrigued by the unique Joshua Tree, having grown up with the U2 album of the same name.  These trees have also been described as Seuss-like, so I was driven to see one up close and personal.  Incredibly, when I proposed the idea of taking a "small detour" on our way to southern California, Cristi agreed.

We set out early that morning and arrived at the south entrance of the park by lunchtime, where we cooked a picnic lunch of hot spam sandwiches at the Cottonwood Spring picnic area.  It was a bit chilly in the shade in January but not unbearable.

Picnicking at the Cottonwood Spring Picnic Area.  Note the use of the backpacking stove.
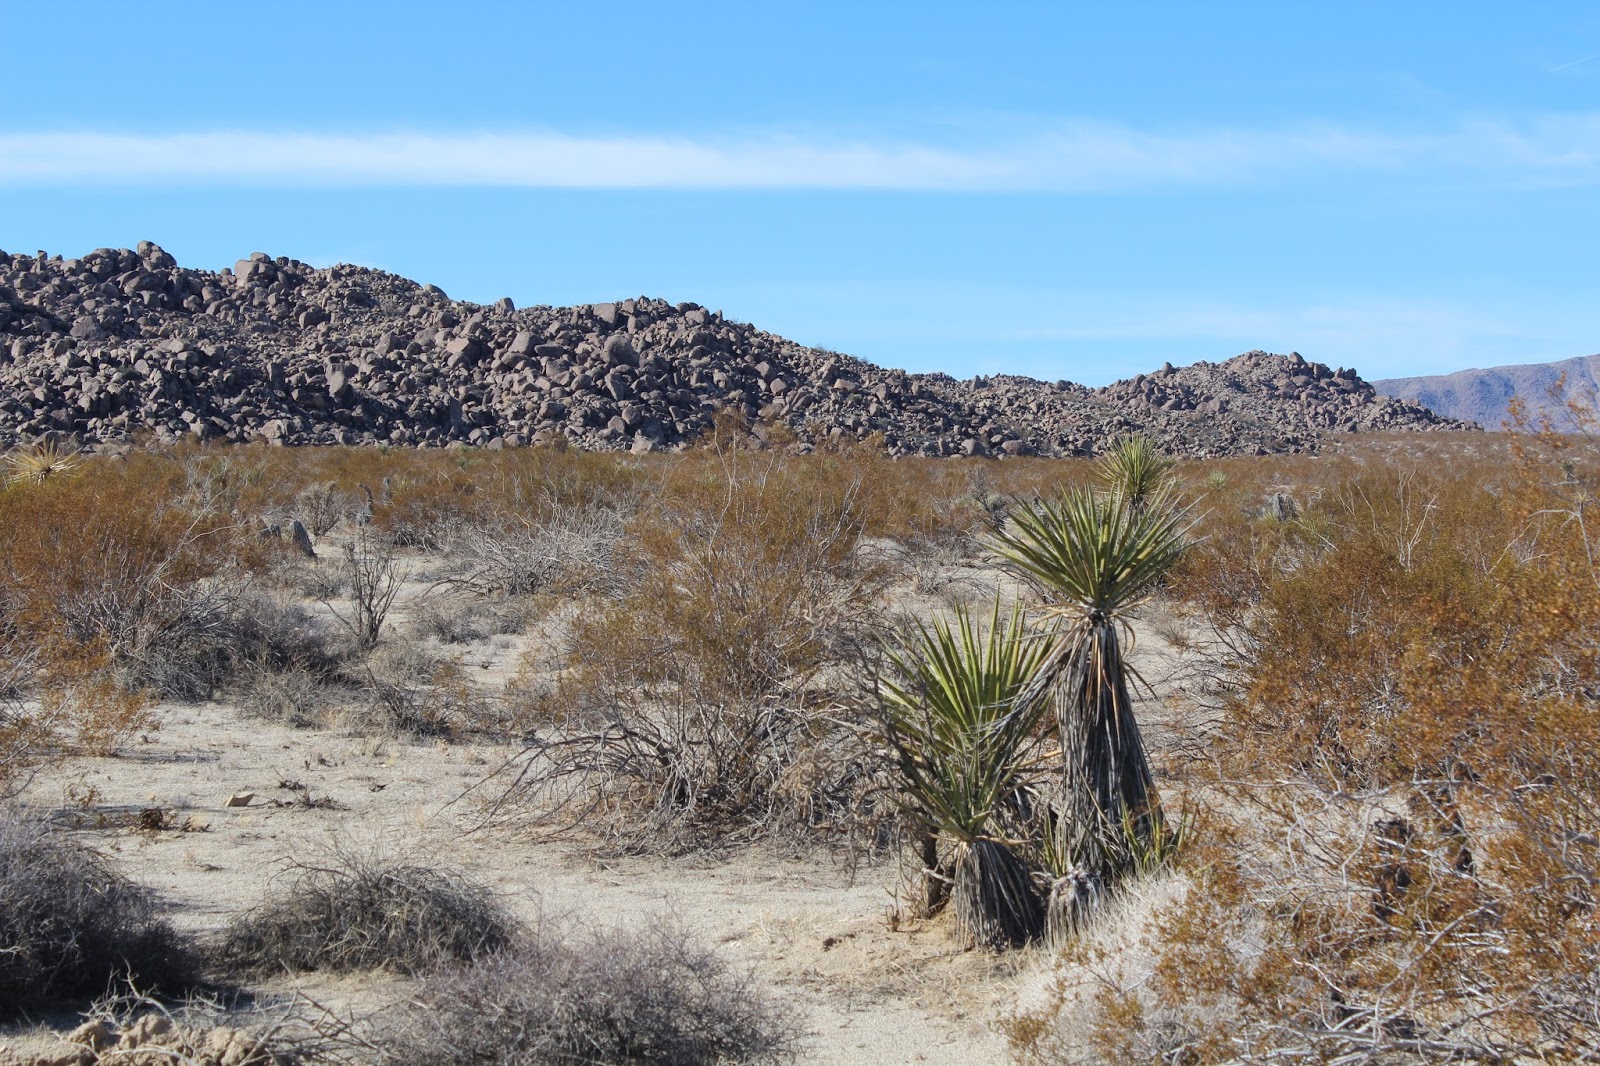
We were, of course, most interested in seeing the park's namesake, but apparently it is only found in one area of the park.  So, after lunch, we took the long park road northwest. What we found along the way was a desert wonderland of both beautiful and bizarre rock formations, including desert mountains, what appeared to be enormous piles of rock off by themselves, and a forest of cholla cactus (also called teddy bear cactus because of its deep desire to "cuddle" or jumping cholla because it practically jumps off the plant itself and onto you).


In the northern part of the park, we also came to Jumbo Rocks.  Here, Brennan seized the opportunity to climb and pose. 


Skull Rock was nearby as well, and since we were on our way to Disneyland, it conjured up images of the Skull Rock from Pooh's Grand Adventure.


It was also here that we finally discovered the elusive Joshua Tree.  It was beautiful and majestic in a desert plant sort of way, while also simultaneously very Seuss-like with its "hairy" trunk and spines at the ends of the branches.  We marveled at how these strange plants were only found in this part of the Mojave Desert and what made it special -- a similar question to why Saguaro cacti are only found in the Sonoran Desert around Tucson when it's all "desert".


Alas, we didn't find the famed U2 Joshua Tree, but I'm told it was located in a remote part of the park only accessible to hikers but also that it has died and fallen over in the near-20 years since the picture was taken.  Still, this park provided another window into the uniqueness of the North American landscape, even compared to other desert environments, and the beauty of even a barren wilderness.

Blogging Through the Alphabet” style=

Monday, December 28, 2015

I is for Iron Cookware

A few years ago, Cristi got a cast-iron skillet as a gift.  About that time, Brennan and I were part of a Scout troop that did a lot of dutch oven cooking.  I was amazed at how good the meals were out of that thing!  Those scouts cooked everything from mountain man hash to roast to stew to cobbler!  Since that time, our family has jumped in with both feet.  We've added a small 1-person cast-iron skillet and our own dutch oven.  We usually take one of the skillets with us on every road trip (since we cook a lot of our meals on the road because of Lauren's food restrictions) and both a skillet and dutch oven on camping trips. (Alas, we don't take either on backpacking trips!)

My cast iron collection, including a lid lifter and lid holder for the dutch oven
The beauty of cast iron cookware is three-fold:

1)  It's tough to get stuff to stick, which means that your food doesn't burn easily, although this applies primarily to gas and camp stoves.  Electric stoves are more problematic since the skillet sits directly on the heat source and turning the heat down doesn't immediately remove the heat like it does with gas stoves.  Thus, controlling the heat is more art than science. 

2)  That leads me to the second point:  Cast iron is extremely easy to clean.  Simply put hot water in the skillet/dutch oven and let it sit for a few minutes, then scrape it using a scraper, scrub brush, or metal sponge (Note: Do NOT use an SOS pad, and try to avoid using soap because the cleaner will actually soak into the iron).  If you're in the backcountry and don't have ready access to a good scrubber, never fear: you can use dry sand as an abrasive to get all the food off the iron.

3)  Finally, they're extremely easy to maintain.  They'll outlast you if well cared for.  Simply wipe it out with a paper towel, then pour a spot of oil in it and rub it in with another paper towel.  This treatment keeps it from rusting and keeps it well seasoned. For dutch ovens, rub oil on the inside of the lid as well and store with a paper towel folded up between the rim and the lid to keep the lid from sealing onto the bowl.

For those not familiar with them, dutch ovens can be used to cook anything you would cook in your oven at home.  You control the temperature by the number of charcoal briquettes above and below.  The ratio is generally 2 briquettes on top to every one on the bottom because heat rises.  For example, for a 12-inch dutch oven at 375 degrees, place 9 on the bottom and 18 on the top.  I recommend purchasing a dutch oven cookbook at the same time you buy your dutch oven so you'll have recipes to try as well as a temperature chart.

Red Beans & Rice -- a staple at our house
We made chili on our last campout -- incredibly easy in the dutch oven.
We also made cinnamon roll pancake on our last campout.  It worked incredibly well with no sticking!
We have so fallen in love with our cast iron cookware that we have scrapped every other skillet in the house.  No other skillet cooks as well or cleans up as easily.  And that's especially important when camping and cleaning conditions are more primitive or you want to spend more time enjoying nature than cleaning up your dishes.

Blogging Through the Alphabet” style=

Monday, November 23, 2015

D is for Dehydrated Meals

The first time I went on an overnight backpacking trip, I really had no idea what I was doing.  The entire thing was really one big experiment, including food.  I won't belabor that because there will be an entire post later dedicated to that first overnight hike, but suffice it to say for this post that we really didn't eat very well.  I don't remember what we planned for breakfast, but lunch was Slim Jims and some crackers.  Dinner was a military MRE (meal ready to eat) because I thought it would be light and compact.  It was neither.

Since then, I've done a fair amount of research on backpacking meals, and there is a wide spectrum of philosophy.  Some just "get by" with cobbling food together like we had on that first backpacking trip.  Others want to eat well but like to push that "Easy Button", so they go for prepackaged food from vendors like Mountain House.  Still others aren't afraid to pay the price in weight and bulk to eat like a king and will prepare gourmet meals using their Bakepacker oven with a cook pot to bake bread, poach fish, cook rice, and make omelets.

Those that are willing to sacrifice just a little in food quality -- from 5-star to 4-star, for example -- but still want control over their cuisine usually take one of two approaches:  Mix and cook the ingredients on site in a communal pot, or dehydrate everything and pack in individual ziplock bags.  The former is easier on the front end but requires someone to carry a cooking pot, while the latter either requires you to dehydrate your own food or purchase dehydrated ingredients from commercial suppliers, such as Harmony House, FoodStorage.com, Wilderness Dining, and Amazon.

After much research and soul-searching, I finally settled on this last method for many reasons.  First, everyone gets their own bag of meals at the outset of the trip.  Second, it's the easiest method, by far, of cooking on the trail -- just add boiling water to your ziplock bag of food.  Third, it's the lightest; all you need are your food bags and a stove with a 1-liter cup/pot.  Finally, cleanup is simple; just throw your ziplock bag into whatever ziplock bag you're using as your trash bag.  The pics below are representative, except that these were on a regular trip vs on the trail.

Water boiling for the meal.
Just add water -- a little more than you think, especially for foods that guzzle water, like rice.
We made our own food cozies out of a car sunshade to insulate the food while it rehydrates. 
Consume and enjoy your delicious meal!
We've now found several meals that have become favorites on our trips:

- Thanksgiving on the Trail -- Dehydrated chicken, Stove Top stuffing, dried mashed potatoes, and Craisins (from The Scout's Backpacking Cookbook)
- Mexican Rice (get the recipe here)
- Beans + Rice with Fritos and Cheese (get the recipe here, but note that we modify it using cheese powder instead of real cheese and add all the ingredients except for the Fritos in the bag together, with only the Fritos added at the end after rehydration)
- Beefy Noodles -- 1 Ramen pkg, 1 oz instant onion soup mix, 3-5 Tbsp dehydrated ground beef, 2-5 Tbsp dehydrated vegetables, 1/4 tsp garlic powder, 1/4 tsp ground ginger, 1/2 tsp dried cilantro (credit to my hiking partner, Doc Holt, for this recipe)
- Omelet -- Powdered eggs, bacon bits, dehydrated peppers, and cheese powder on a pita (from The Scout's Backpacking Cookbook)

Once I made this decision to make my own dehydrated meals, I invested in a dehydrator, and it has been well worth it.  If you decide to go this route, I highly recommend the Excalibur 3926TB.  It's expensive, but it works much better and can hold much more food than the more consumer-oriented models.  Not all those that prepare their own meals for backpacking, however, go this route.  Noted backpacker, Andrew Skurka, buys all of his ingredients online, believing that, despite the additional cost, dehydrating his own food takes too much time and effort.  Obviously, some ingredients are near impossible to dehydrate, like milk, cheese, and eggs, but others, like rice, tomatoes, and peppers are straightforward.

We also use our dehydrator extensively for making our own jerky.  You can't have a backpacking trip without jerky (I'm pretty sure it's illegal!), and commercial jerky is pretty expensive.  The Scout's Backpacking Cookbook has a wonderful jerky recipe.  Finally, while not technically a dehydrated meal (it cooks in the oven), I also have to share that we make our own granola (trail mix) and have tweaked it to perfection.  If you'd like the recipe, you can get it off of Cristi's blog.

Ultimately, you have to decide for yourself what food philosophy you subscribe to for backpacking.  But if I've piqued your interest and would like to look for more dehydrated backpacking meals, I recommend starting your search with both Andrew Skurka and the Backpacking Chef. As an aside, these meals can also be good options for those that prefer to picnic during their roadtrips vs stopping to eat in a restaurant for each meal.

Blogging Through the Alphabet” style=

Wednesday, October 28, 2015

Camp Cuisine

In my last post, I promised a post on what we ate while we were camping in Wyoming.  First, a little philosophy:  Camping is not the time for just "getting by" with sandwiches and beanie-weenies.  If anything, it should be amped up above the normal everyday.  That said, I don't want to spend all day cooking either (nor do I expect Cristi to).  I'm on vacation, and adventure is sounding her irresistible call.  Therefore, meals should be relatively easy.

A few of the highlights are below, but, first, a little about the camping gear we use:  Typically, we take a traditional propane 2-burner Coleman camp stove and a propane tabletop grill.  Those two will do almost everything you need.  Over the last year or so, we've also branched out into using a backpacking stove (such as a Jetboil, MSR Micro Rocket, or similar) to boil water for coffee or cook up spam or hotdogs for an on-the-go hot picnic lunch.  This time, we also brought the dutch oven (the cast iron type, not the household type).  This is one of my favorite cooking tools because it works just like an oven, and it's almost impossible to burn something in it.

A few of the highlights included:

Breakfast:
- Mountain Man (also known as breakfast hash) -- The sausage was browned ahead of time; the hash browns were dehydrated, rehydrated, and heated with sausage and eggs; the eggs were scrambled and dumped in the skillet on the camp stove with the sausage and hash browns. Note that this could have been cooked in the Dutch oven as well, adding cheese if desired. Serve by itself or as breakfast burritos.

- Cinnamon Roll Pancake -- The dry ingredients were mixed together ahead of time with the wet ingredients added on site.  The icing was also mixed on site.


Lunch/Dinner:
- Stuffed Burgers -- Made up ahead of time, stuffed with cheese and bacon.  We cooked them on the tabletop grill and sauteed onions and mushrooms in a skillet on the two-burner stove to be used as toppings.  We served them with chips.  NOTE:  This was probably our most time-consuming meal to make.  If you don't make them up ahead of time, plan for an extra hour of prep on-site.


- Chili -- The hamburger meat was browned ahead of time so all the ingredients could just be dumped into the Dutch oven and heated.


- Apricot-Ginger Pork Chops -- Marinade ahead of time, then grill. We served them with mashed potatoes cooked on the camp stove.  If this sounds as yummy to you as they did to us, you can get the recipe from Cristi's blog.

Dessert:
- Brownies -- These were made up as a dry mix with the wet ingredients added just prior to cooking.

- Berry Crisp -- The topping was mixed up on site and put on top of the berries in the Dutch oven. Put some cool whip on top, and it's just like Grandma makes!

And, of course, we made s'mores one night because you can't go camping without s'mores!

You can tell we don't go hungry when we're camping.  The meals we fix are easy to cook and clean up and keep our kids begging for more!

Sunday, March 16, 2014

Another Afghan Meal: Seafood!

This week, my interpreter, Safi, ordered fish from downtown and brought it in to share, so I just had to share!


Captain Phillips, my lead Defender, who is from North Carolina (the photo bomber at the end of the table on the left -- not of Somali pirate fame) and I both decided that it was a lot like a good old fashioned fish fry.  It smelled delicious and tasted great, but you had to eat slowly to look out for the bones.  It was awesome!  And it wouldn't have been an Afghan meal without naan (bread). 

I will definitely miss the food when I'm gone. It's one of the things I look forward to every week (even if my counterpart forces me to eat fruit!). I think I'm going to need to learn how to make that ubiquitous Afghan bread and rice before I leave and pass it on to Cristi. What do you think?