Monday, January 25, 2016

M is for Mogollon Rim (aka Just 2 More K)

As I mentioned in a previous post, back in 2012, the Scouts planned to spend a year prepping to hike the Grand Canyon.  Unfortunately, we were unable to get a permit.  Our Scoutmaster remembered taking a group of scouts on the General Crook Trail along the Mogollon Rim many moons ago, so he suggested that as an alternative.  As an added bonus, not only could the scouts earn their Backpacking Merit Badge, but they could also earn the 50-miler Award and the National Historic Trails Award.

The General Crook Trail hearkens back to the time of the Indian Wars of the late 1800s.  General George Crook originally built this wagon trail as a supply line for Forts Verde and Whipple (near modern-day Camp Verde and Prescott, AZ) from Fort Apache 200 miles to the east.  But the Mogollon Rim proved a good surveillance point for patrols as well.  The rim sits 2000 feet above the valley floor, which ranchers used to graze their cattle.  The Apaches, in turn, would often raid the ranchers, so General Crook set up patrols along the rim to interdict the raiding parties.  This wagon trail was later preserved by the Forest Service as a National Historic Trail, providing beautiful views down into the lush, green valley along the 2000-foot escarpment.

We planned to hike 50 miles over five days but knew water would be an issue.  There is no water running along the trail, so we coordinated a chase crew of two of the adult leaders, who would find a suitable campsite along the way then radio us to tell us where to meet them, giving us access to the water our crew of six needed to refill our bladders, cook, and do laundry.

We arrived and set up our campsite just yards away from the rim.  The views there were spectacular!


The next morning, we had our first foreshadowing of the way the week would go.  Doc and I brought our GPSes that had the trail marked on there.  I began looking around for the trail but couldn't find it, despite the GPS telling me I was right on top of it.  It just looked like a forest of new growth several years after a forest fire.  It was so overgrown, however, that despite our ability to follow our GPS, it would be too much work to slog through, so we made the decision to hike down Forest Service Road 300 hoping it would intersect some semblance of the trail later.


We did eventually intersect the trail.  We followed it for a while, but it quickly became overgrown again.  That would sadly be a continuing story for the entire week.  Along the way, we replaced blazes and repaired rock cairns to make the trail a little better, but, ultimately, our efforts were futile.  At one point, we followed the trail as it was fairly well marked, but it ended right at a 100-foot cliff.  We worked together to scramble down and continue on, but we didn't find the trail again at the bottom.


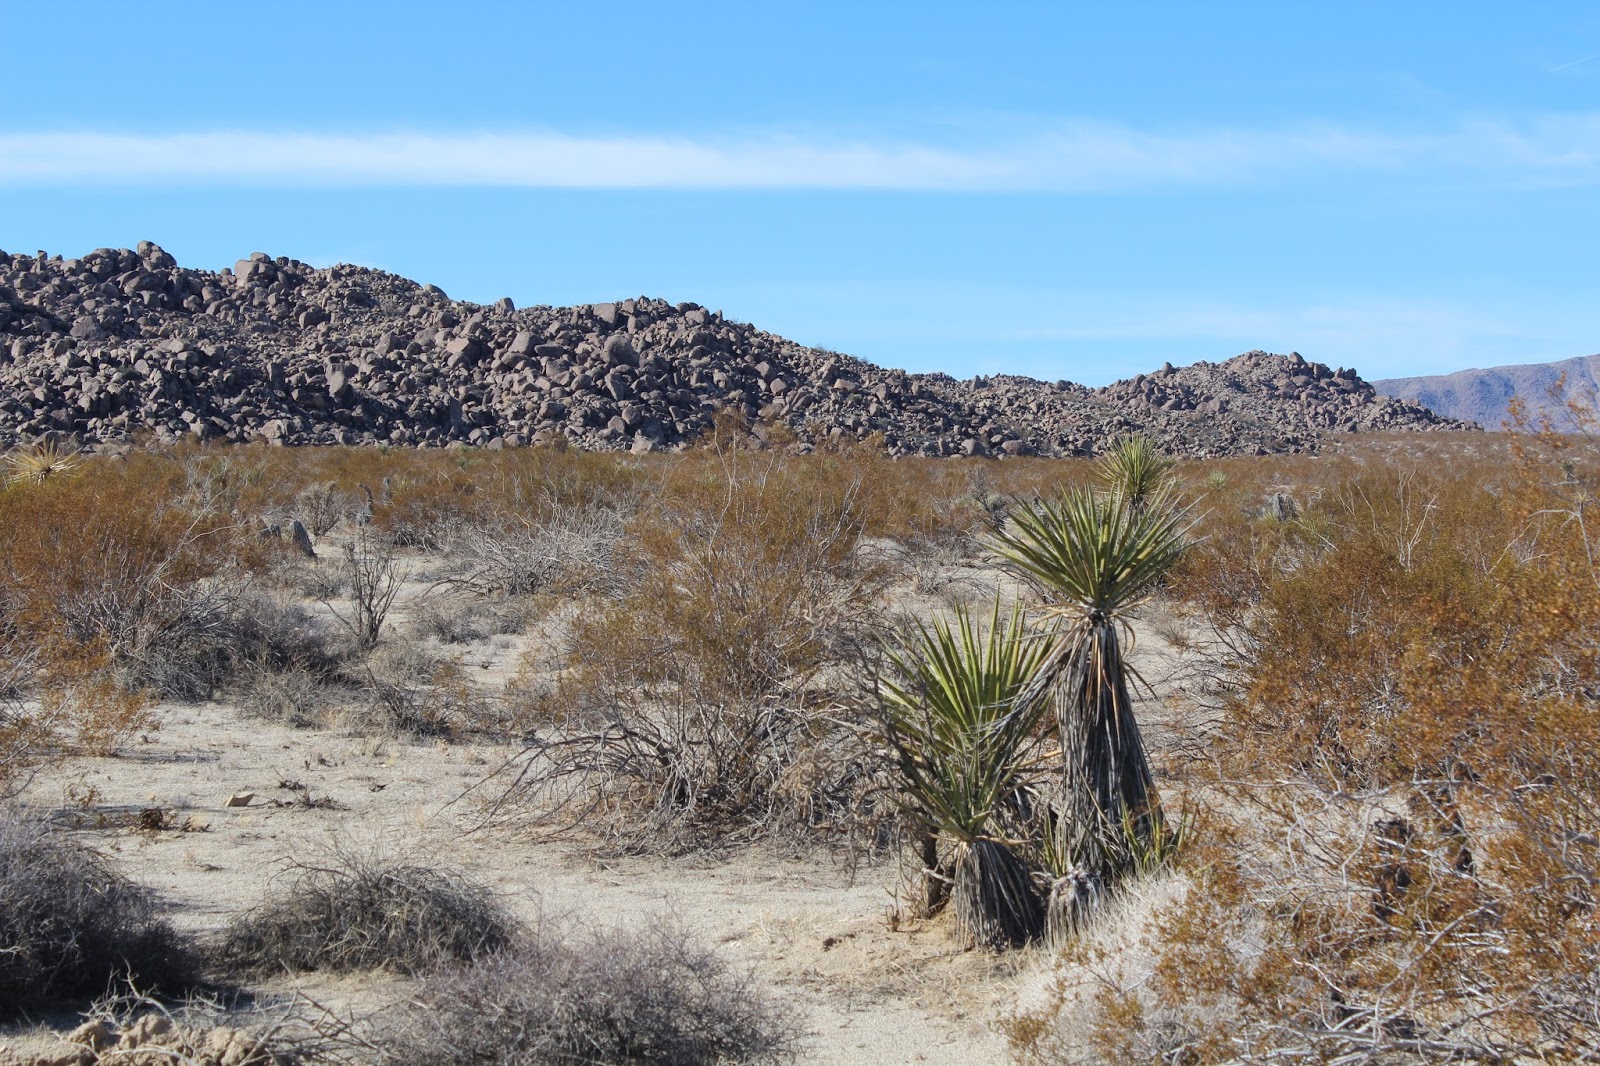
Still, despite our frustrations with finding the trail, we walked through pretty country -- much different from the brown desert of Tucson.  We alternated amongst forest and open meadow, with spectacular views of the rim thrown in.


Once, as we walked through rolling hills, we spotted a meadow of yellow wildflowers off in the distance.  I remarked that it would be cool to walk through that vast expanse of beauty, and, before long, we did.  Unfortunately, that meadow of quaint, pretty, romantic wildflowers turned out to be one large tangle of vines that we were continually tripping over.  If that weren't enough, one of the scouts was extremely allergic to the pollen we were kicking up and couldn't stop sneezing.  But once in it, the meadow seemed endless.  We must have walked over a mile through the wildflowers before we left it behind for good with all of our shoes left a brilliant shade of yellow.


On the fourth day, we again found ourselves following the trail primarily by GPS.  As the day wore on, however, we once again found the trail.  We radioed ahead to the chase crew to find out where to meet them.  They assured us that if we just followed the trail, we would run right into our campsite, and, if that weren't enough, they had placed markers along the trail.  Considering what we'd been through already that week, we weren't convinced.  We asked how far away it was, and they told us, "About 2K".  That was good news.  We were getting tired after a hard day of wayfinding.  We walked for a considerable amount of time until we thought we should be there but kept walking until we reached a sign announcing the Gen Crook Trail, but ironically, the trail once again vanished there.  We radioed ahead to find out where we were supposed to go but they told us to keep following the trail and their markers; it was only 2 more K ahead.  We pulled out the GPS and followed it until we picked up the trail again.  Finally, we came to a road crossing.  It seemed like we had gone way more than 2K.  Again, we radioed.  Again, we were told to follow the trail, and we couldn't miss the campsite.  It was only about 2K away.  We walked on and did eventually pull into camp, and they were right:  It was impossible to miss, complete with American flag hung across the trail.  I guarantee we walked more than 2K, though.  That became our inside joke for a long time.


Our last day, we set out again on the trail.  It soon evaporated, though, and we never found it again.  We spent the day following the trail by GPS.  We hiked over rolling hills of grassland, crossing fencelines as we tried to follow the GPS trail.  That afternoon, we crested a hill and saw a truck off in the distance.  As we walked on, we converged with it, and it was our chase crew.  They were looking for us.  With the instincts of a tracker, Jack, our Scoutmaster, had predicted that we would be coming over that ridge at that exact time.  They had been scouting the trail ahead of us and discovered that the trail itself became a very busy highway with no shoulder.  Since we had hiked more than our 50-mile goal, they declared we were done, picked us up, and transported us to a campground with a big open area to set up our shelters and a beautiful creek running through it.  We washed our faces and dipped our feet in the creek, and life was good.


After an entire year of work, the boys had put a satisfying exclamation point on their journey from little-to-no previous backpacking experience to being capable of finding their way along a poorly marked route for five days.  Even without the best gear, they had become backpackers.


Blogging Through the Alphabet” style=

Wednesday, January 20, 2016

Snowshoeing: A Bucket List Completion

Several days ago, I had a chance opportunity to cross snowshoeing off my bucket list, and I seized it.  Not knowing where to go or what exactly I was getting myself into, I asked an acquaintance at church for some recommendations, and he offered to take me out.  We went to Bear Creek Regional Park, where there's a road over the mountain that's closed in wintertime.  We didn't get to go as far as we wanted because my new snow boots that weren't bought for hiking began to rub, but we did get in about 2.5-3 miles.

Since it was a closed road over a mountain pass, the road took us straight up for as far as we wanted to take it.  Along the way, we passed pine trees draped in snow in picture-perfect fashion, a curtain of ice, and even a stream that still babbled as it meandered down the mountain.  When we finally turned around, we were high enough up to get a gorgeous view of the surrounding mountains as the sun began to set.


The hike down was much easier since it was all downhill, and the crampons on the shoes didn't catch in powder giving a mild skiing sensation.  All in all, the outing was a huge success, giving me the intro I needed before planning an actual snowshoe hike. The next step is to find a time to get the family out!

Monday, January 18, 2016

L is for Lighting a Fire

One of the most useful and important outdoor skills you can learn is how to start a fire.  Fires are everywhere -- from bonfires and fire pits with friends to emergency fires in the backcountry to keep warm; from cooking fires to lighting a charcoal grill.  And who doesn't love a good fire in the fireplace in wintertime?  This post covers two different types of fires:  Lighting charcoal and backcountry fires.

Lighting Charcoal
Four years ago, after burning out yet another burner on a gas grill, I was frustrated that I was replacing it about every 2-3 years.  Shortly before then, Brennan's Scout troop had introduced us to a miracle invention:  The charcoal chimney.  I had long ago written off charcoal grills because they never seemed to want to light, and using an entire bottle of lighter fluid to get one set of coals lit somehow didn't seem like the best idea.  After discovering the charcoal chimney, however, I have moved back to the old-fashioned Weber charcoal grill and have never looked back.  It was also shortly after that purchase that I got my dutch oven, which also requires charcoal.  Now I'm happier than a bear in a salmon stream because these charcoal chimneys work every time -- well, almost every time.  Here's how:


The chimney has a raised platform about 2-3 inches off the ground with holes all the way around the bottom.  Roll up about 3 single newspaper sheets and stuff them into the holes at the bottom of the chimney, getting most of the paper underneath (you don't want or need very much sticking out through the holes).  Then fill up the top of your chimney with charcoal and light each of the rolled-up sheets.  As the fire burns the paper underneath, it also licks the briquettes at the bottom of the chimney stack.  The paper should burn long enough to catch those coals on fire, which will in turn light the coals above, and so on until you can see the flames licking out the top of the chimney.  You can tell how well it's working by the amount of smoke coming out the top of the chimney.  If you light the paper on the outside of the chimney, and the fire goes out before the coals get fully lit (your best indication would be the tiny amount of smoke emanating from the chimney), then try sticking your lighter in through the holes at the bottom and lighting the paper underneath the chimney.  While I never had to do that before moving to Colorado, that technique seems to work better here.  Once you get a good fire underneath, the whole process takes about 15 minutes for the flames to reach the top of the chimney.  Allow longer for coals going on a dutch oven, however, to ensure they're fully lit.

Backcountry Fires
Being able to light a fire at a frontcountry campground is a good way to stay warm at night while you're having fun with friends or making s'mores, but in the backcountry it could save your life if you find yourself in a cold situation unexpectedly or without the proper gear.  Of course it starts with standard fire-building techniques -- for example, the tepee method of placing your highly flammable yet short-lasting tinder (like dry grass or leaves) in first in the middle, followed by small twigs, leaned against each other in a circle like a tepee, followed by larger sticks in a tepee around the twigs.  Obviously, the concept is that the fire is easily lit and then gradually spreads to the twigs that take a little longer to light and on to the larger sticks that take considerable time to light.

Sometimes, however, it's not as easy as the charcoal chimney.  For instance, if the tender is damp or doesn't want to light for another reason, a firestarter can help.  Of course, you can buy firestarter sticks just about anywhere from Wal-Mart to Sierra Trading Post, but for much cheaper you can make your own out of cotton balls and vaseline.  Simply take a cotton ball and a daub of vaseline about the size of your pinky nail and work it into the cotton ball.  It usually ends up fairly flat.  I usually make several at a time and store them in a small ziplock bag to take with me on a backpacking trip.

Vaseline-soaked Cotton Balls -- Instant Tinder!
When you get ready to use it, spread it out to provide as much surface area as possible and place it on top of your tinder.  That should jumpstart both your tinder and your twigs.  If rubbing vaseline into cotton balls isn't your thing, or you don't have the ingredients laying around the house, something I guarantee you have that's very light and works just as well, is dryer lint.  (Incidentally, dryer lint also works very well as additional tinder under the charcoal chimney on particularly cold, windy, or otherwise stubborn nights.)  Finally, the coolest (and perhaps most reliable) way to start a fire is with a 9-volt battery and steel wool (no match or lighter required!).  Simply put the steel wool on top of your tinder and touch the terminals of the 9-volt to the steel wool, and presto!  Instant fire!  It's like voodoo magic!

Blogging Through the Alphabet” style=

Monday, January 11, 2016

K is for Kitchen Tote

I like being organized, and, going camping, that's especially important.  It's so easy for stuff to get left out and misplaced or, worse, never even make it on the camping trip because your gear is scattered out in many different places.  Checklists help tremendously, but it's nice having everything all in one place so it's grab-and-go.

We used to keep our camp kitchen gear in a large Rubbermaid tub, but as our family and gear grew, many essentials were getting shoved out.  As I was shopping the sales one day, I came across a tote from REI that is slightly larger than a Rubbermaid tub, but like Hermione's beaded bag, it seems there is always room for more stuff, and there are dividers and organizers to keep the gear more organized inside.


Inside the main compartment, we keep tableware and glasses for 8, two cook pots, the collapsible water jug, two backpacking stoves, two skillets, a bunch of propane bottles, all of our cooking utensils, potholders, cutting boards, paper towels, and a few other various-miscellaneous.  It has a large pocket on each side that hold napkins, foil, plastic wrap, trash bags, dish soap, sponge, and a dish towel.  And most of those pockets aren't even close to full. 


While we rarely use it, this particular model also comes with a small table that can hold a few things since it seems like there is never enough flat work space at a campsite.


All together, this tote holds pretty much all of our camp kitchen gear with the exception of the camp stove and grill, cast iron skillet, dutch oven, and, of course, food.  Speaking of food, since we do travel almost everywhere with our own food, we also recently found another organizer at Sierra Trading Post to hold all of our non-perishable food.  We haven't actually tried it out yet, but I'm excited about the possibilities.


It's basically three large rectangular bags that can be used either separately or inside a "pen" of sorts to keep them all contained.  Granted this won't always work, but square containers tend to fit nicely in our SUV trunk, while providing ample opportunity to stuff additional smaller or odd-shaped items in the crevices, so it makes packing much easier.

The REI tote unfortunately isn't still available.  But, for similar items or organizers that may fit your needs better, REI, Sierra Trading Post, The Container Store, Coleman and even Target are great places to shop for camp kitchen organization, especially if you're willing to be a little creative!

Blogging Through the Alphabet” style=

Monday, January 4, 2016

J is also for Joshua Tree National Park

Back at the beginning of 2013, our family was heading to Disneyland in California.  As I mapped out our route, I realized that we would go right by Joshua Tree National Park.  At that time, I hadn't added the exhaustive list of NPS sites to my Bucket List, but I loved exploring new landscapes.  I was also intrigued by the unique Joshua Tree, having grown up with the U2 album of the same name.  These trees have also been described as Seuss-like, so I was driven to see one up close and personal.  Incredibly, when I proposed the idea of taking a "small detour" on our way to southern California, Cristi agreed.

We set out early that morning and arrived at the south entrance of the park by lunchtime, where we cooked a picnic lunch of hot spam sandwiches at the Cottonwood Spring picnic area.  It was a bit chilly in the shade in January but not unbearable.

Picnicking at the Cottonwood Spring Picnic Area.  Note the use of the backpacking stove.
We were, of course, most interested in seeing the park's namesake, but apparently it is only found in one area of the park.  So, after lunch, we took the long park road northwest. What we found along the way was a desert wonderland of both beautiful and bizarre rock formations, including desert mountains, what appeared to be enormous piles of rock off by themselves, and a forest of cholla cactus (also called teddy bear cactus because of its deep desire to "cuddle" or jumping cholla because it practically jumps off the plant itself and onto you).


In the northern part of the park, we also came to Jumbo Rocks.  Here, Brennan seized the opportunity to climb and pose. 


Skull Rock was nearby as well, and since we were on our way to Disneyland, it conjured up images of the Skull Rock from Pooh's Grand Adventure.


It was also here that we finally discovered the elusive Joshua Tree.  It was beautiful and majestic in a desert plant sort of way, while also simultaneously very Seuss-like with its "hairy" trunk and spines at the ends of the branches.  We marveled at how these strange plants were only found in this part of the Mojave Desert and what made it special -- a similar question to why Saguaro cacti are only found in the Sonoran Desert around Tucson when it's all "desert".


Alas, we didn't find the famed U2 Joshua Tree, but I'm told it was located in a remote part of the park only accessible to hikers but also that it has died and fallen over in the near-20 years since the picture was taken.  Still, this park provided another window into the uniqueness of the North American landscape, even compared to other desert environments, and the beauty of even a barren wilderness.

Blogging Through the Alphabet” style=

J is for Junior Ranger Program

I love visiting National Park sites.  With the 434 parks under the National Park Service, there is something for everyone, whether it's nature or geology or beaches/marine life or history of literally anything American.  And there's sure to be a site to visit within a short drive.  If you have younger kids, though, maybe you feel they don't appreciate these sites the way you do, and you leave more frustrated than fulfilled.  Enter the Junior Ranger program!

Grand Teton National Park
Each park has a booklet (almost all are free) for kids to complete as they move throughout the park.  Most have a combination of games, scavenger hunt, and short answer with instructions on where to go to find the answer.  While grade school-age is the ideal target, most parks require less out of younger kids than older kids and can be adapted down to kindergarten-age with some help from mom or dad or a helpful sibling.  Once complete, they get sworn in as an official Junior Ranger and get a Junior Ranger badge.  A couple of parks we've been to even had special surprises:  One Junior Ranger badge was wooden and smelled like a campfire.  Another gave us the option of a patch instead of a badge.

Petrified Forest National Park
There are two minor downsides to this program.  First, those with younger kids won't get the complete joy of focusing on the park while your child blissfully works on the booklet independently, but likely it's much better than having nothing to do, and, chances are, they'll learn something along the way and may grow to love National Park sites as much as you do.  Second, we've been to a few of the smaller sites that we've actually spent longer there than we needed to because we were working on the booklet.  Still, we're only talking half an hour to an hour longer -- not something exorbitant. Most booklets take about the same amount of time or less than you would want to spend at the park.

Lauren now looks forward to our visits to the National Parks, which is important since my Bucket List includes visiting all 434 sites under the Park Service.  If you're looking for a site, check out my NPS Sites page, which lists all 434.  They're broken down by subject, so you can find something that interests you.  Many also have links to the actual NPS website and will eventually have trip-planning information, so you may want to bookmark it and keep checking back.  Hope you find your park, and I hope your family enjoys the ride!

Blogging Through the Alphabet” style=